The tubeless system is an incredible solution that has become a standard among professionals and many cycling enthusiasts. What is a tubeless system and why is it superior to inner tubes?
The most common and simplest solution used in bicycle Wheels is a tire with a tube. This is an inexpensive option, as Tubes do not cost a fortune, and for more experienced riders, they pose no problem in terms of maintenance. However, do you know that moment when you're riding on a great trail and suddenly hear a hiss from your tire? Your mood vanishes, and you start wondering how long it will take to change the tube, or worse, what to do if you simply don't have a spare tube? Changing a tube requires some time, and those seconds are especially valuable if they add to your final race time. If you are a cycling enthusiast and prioritize the most trouble-free ride possible, then the tubeless system is for you. This solution has been in use for several years now and is gaining an increasing number of adherents. If you've never encountered tubeless before, it might seem complicated and time-consuming at first, but in reality, the operating principle is very simple.
The tubeless system relies on a special sealant circulating within the tire during riding. When the tire is punctured, for example by a thorn, the sealant, along with the escaping air, quickly enters the hole and seals it. In many cases, users won't even notice that something has punctured their tire. For larger punctures, this process may take slightly longer. In such instances, it may be necessary to replenish the air that escaped before the sealant could seal the hole. Usually, after re-inflating, you can safely continue your ride. However, sometimes a puncture occurs in such an unfortunate way that the sealant has difficulty sealing it. There are solutions for this as well, which we will also discuss in this article, and before that, we will describe what the tubeless system entails and advise on the accessories you need to enter the world of tubeless riding.
WHAT ARE THE BENEFITS?
Simply put, puncture protection, which we have already mentioned. Additional advantages include the ability to ride with lower tire pressure, which significantly enhances riding comfort, improves bike control and handling, and substantially increases traction.
WHAT ARE THE DRAWBACKS?
Disadvantages include the cost of accessories. A kit consisting of sealant, tape, and valves will be more expensive than two Tubes. For the inexperienced, the installation of a tubeless system or its subsequent maintenance (topping up sealant) might be troublesome, but in such cases, the Wheels can be brought to a service center and picked up ready to ride.
WHAT IS REQUIRED TO USE A TUBELESS SYSTEM?
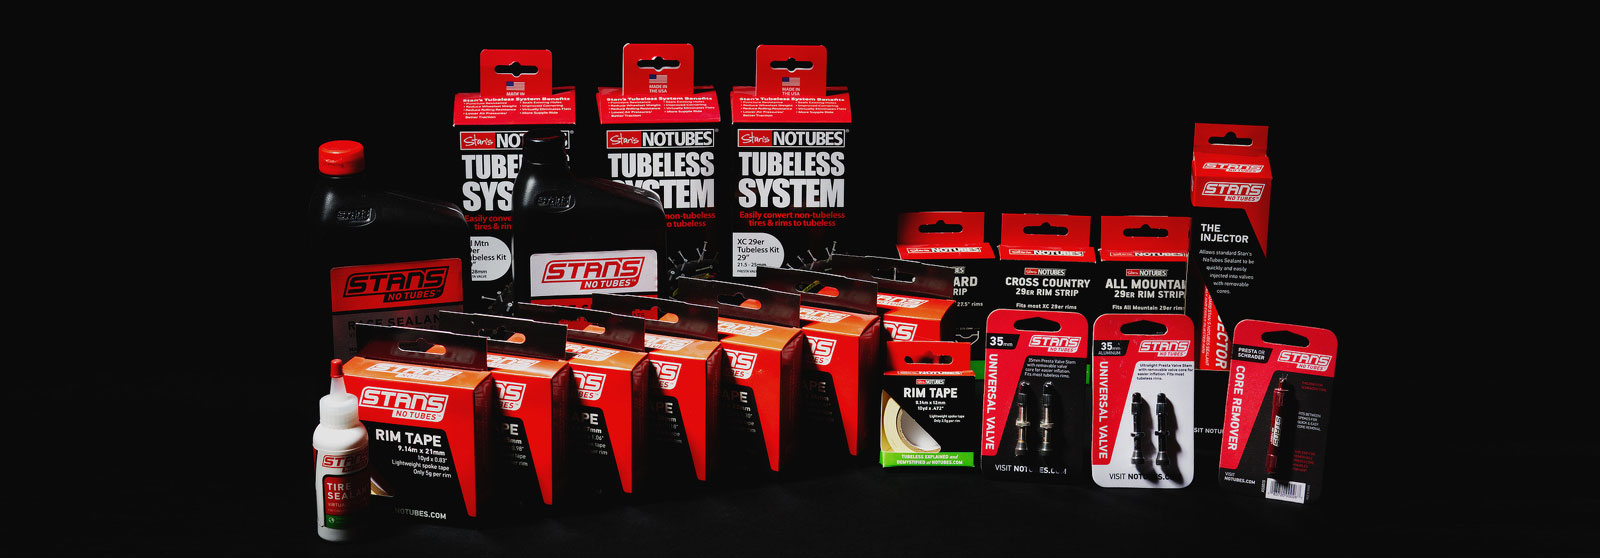
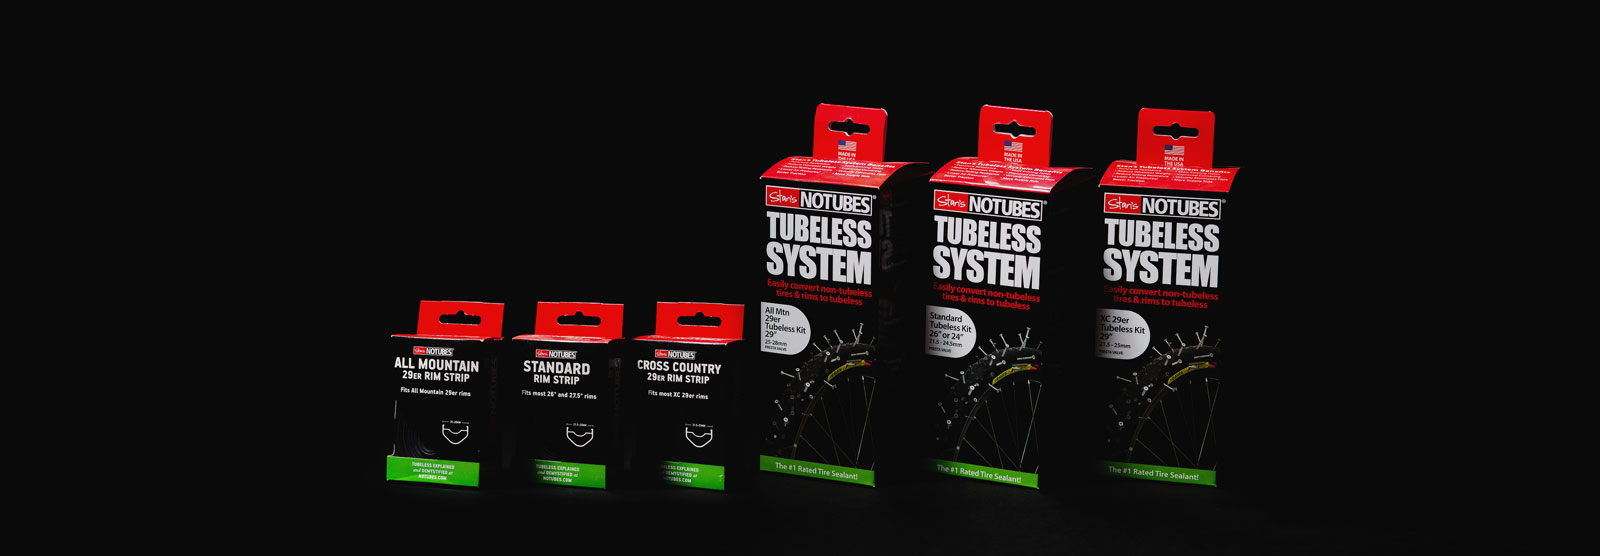
To use a Wheel in a tubeless system, you need rims specifically designed for this purpose, which is not an issue nowadays as most manufacturers offer such rims. In addition to a compatible rim, several special accessories are required. The simplest tubeless system kit consists of sealing tape, compatible valves, and sealant.
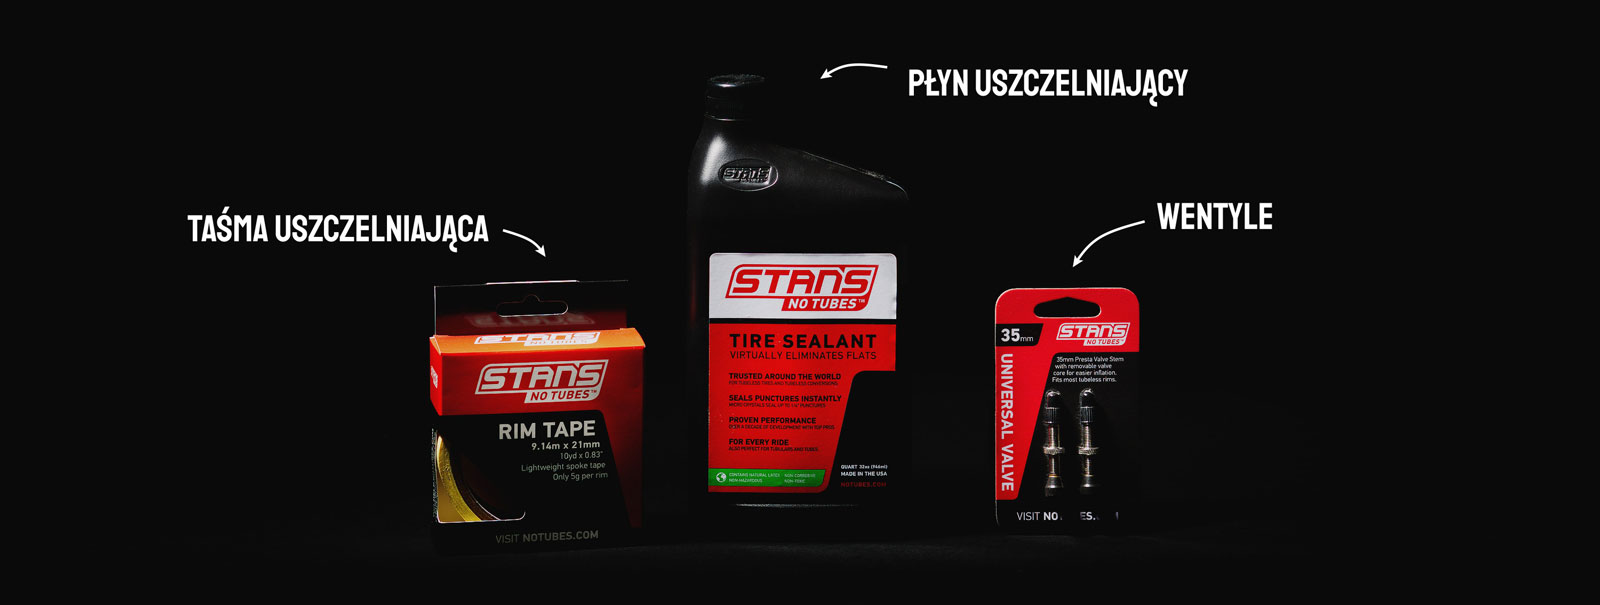
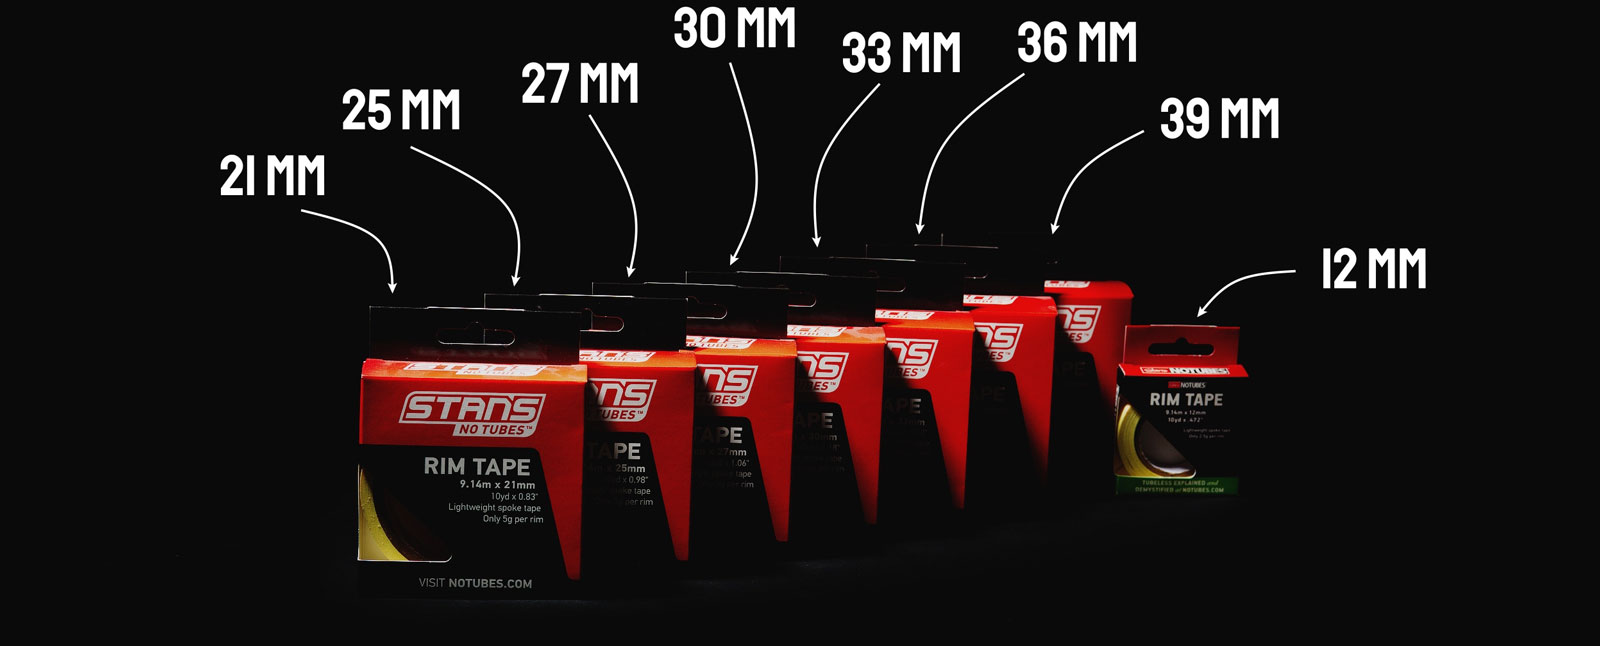
The first step to install a tubeless system is to seal the rim by applying sealing tape. It is important to ensure that the width of the sealing tape is appropriate for the width of your rim. The tape should be applied with an overlap, meaning the end of the tape should cover its beginning, and the rim surface should be degreased. Double-taping the rim is also recommended to enhance sealing properties when using high tire pressure (especially for road Wheels). Stan's NoTubes offers several tape widths: 21, 25, 27, 30, 33, 36, and 39mm. The rule for selecting tape is to choose a tape slightly wider than the internal width of the rim.
Once the rim is taped, a small hole should be made where the valve opening is located. A thin awl or pen can be used for this purpose. Insert the valve into the created hole and secure it properly.
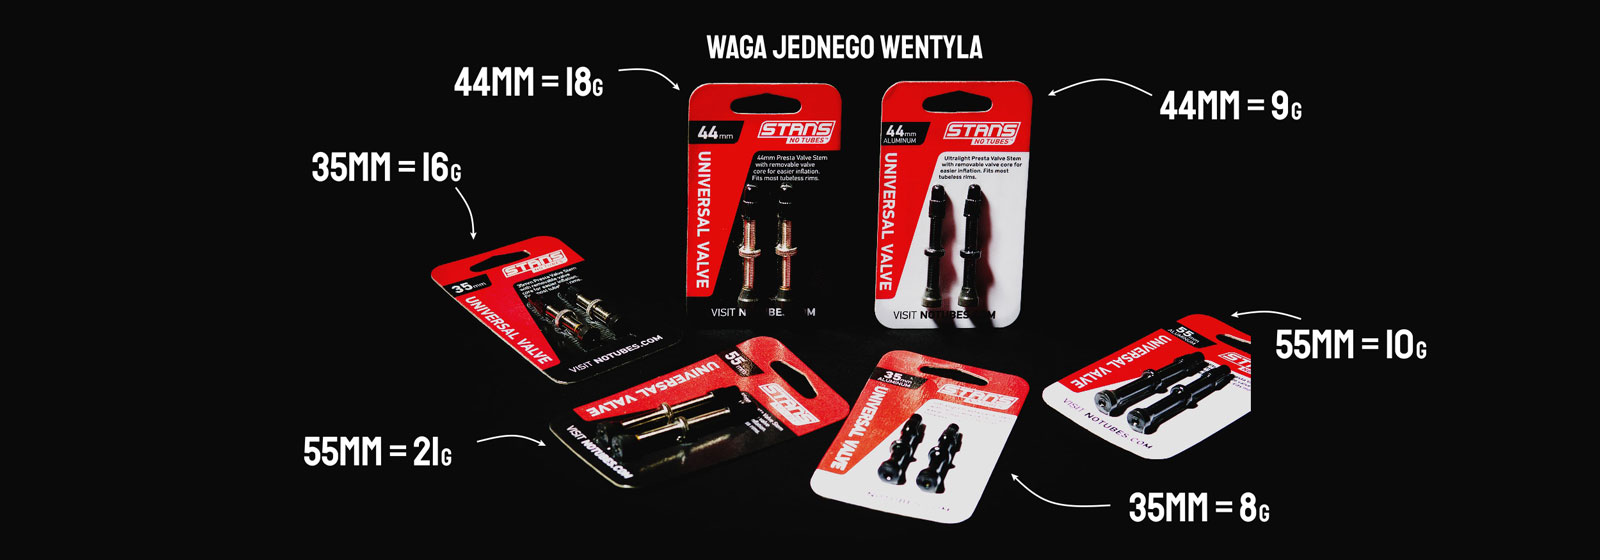
The valve for a tubeless system has a slightly different construction than standard inner tube valves. It features a special shape that better conforms to the rim profile, preventing sealant leakage and, of course, air loss. Stan's NoTubes offers valves in lengths of 35mm, 44mm, and 55mm. They are available in two versions: a standard silver and a black alloy version, differing primarily in weight and color. Stan's NoTubes valves feature a removable core. After removing it, sealant can be poured directly into the tire through the valve.
After the valve is installed, the rim is ready for sealing. Let's move on to tires.
Tubeless-compatible tires are often slightly heavier than standard tires because their sidewalls are thicker. This makes them more puncture-resistant. Another characteristic feature of tubeless-ready tires is their tighter fit on the rim.
TUBELESS TIRE INSTALLATION
It is best to mount the tire on one bead to freely pour the sealant inside. The amount of sealant should be determined based on the tire width. For tires with a width of 23-60mm, the recommended sealant quantity is 60-90ml, while for widths of 63-100mm, it is 90-120ml.
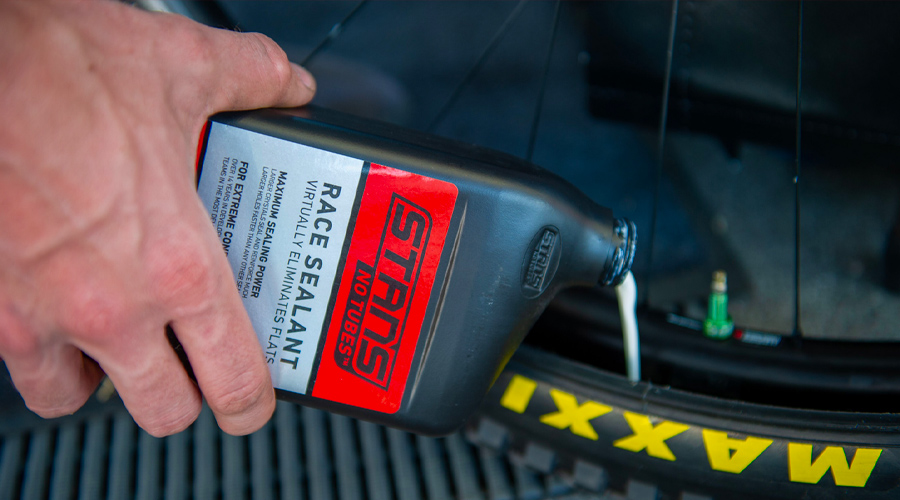
SEALANT
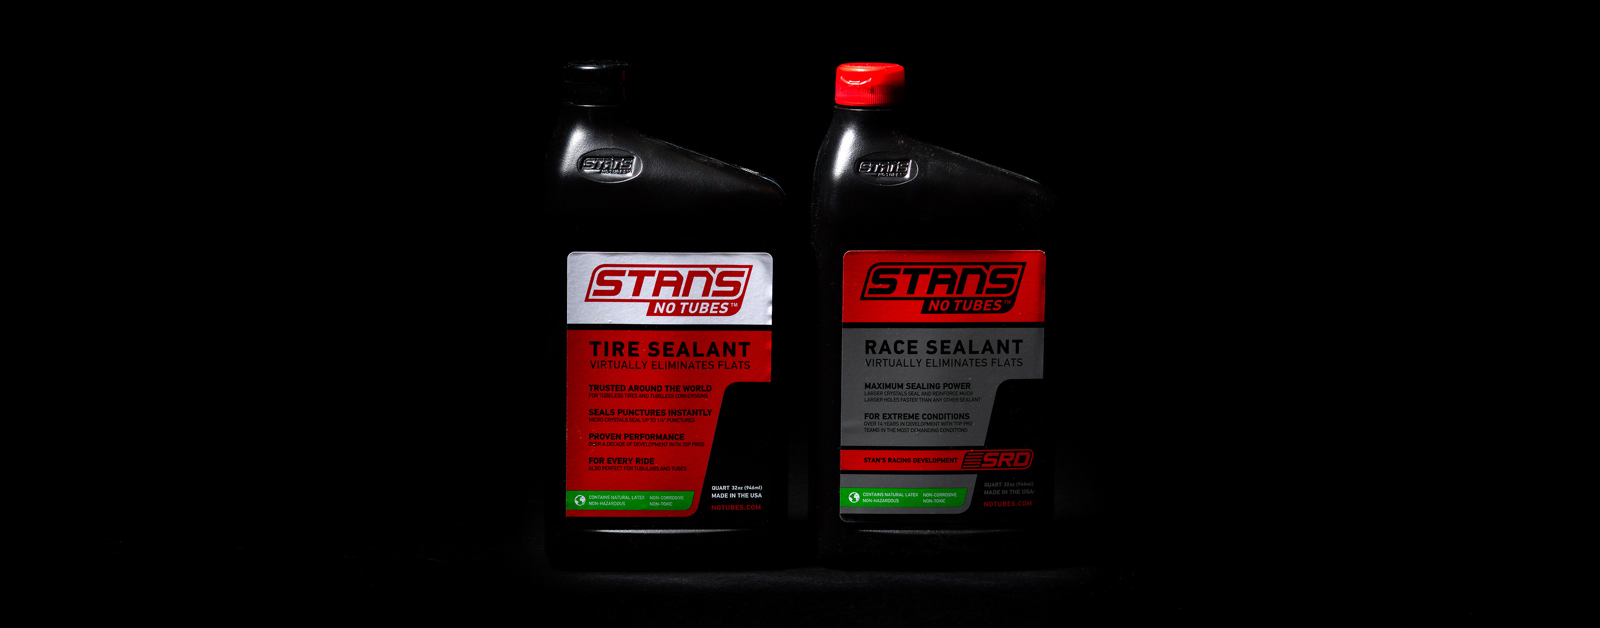
Stan's NoTubes sealants are premium quality, highly regarded in the cycling community. In addition to the well-known standard sealant version, Stan's has produced a RACE version. Both sealants differ in consistency. The RACE sealant is slightly denser than the standard version and contains micro-crystals of increased volume, which are more effective at sealing large punctures and even cuts. Important: RACE sealant cannot be poured through the valve.
After applying the sealant, place the second bead of the tire onto the rim and inflate the Wheel using an air compressor or a specialized pump with a pressure chamber. A common method for rapid Wheel inflation is using CO2 cartridges; however, this is not recommended in this case, as the substance reacts with the sealant.
Once the tire is seated on the rim, ensure that the sealant has spread evenly across the inner surface of the tire, thereby achieving a proper seal. To do this, rotate and shake the Wheel in the air at various angles. This completes the sealing process. The Wheel can then be installed on the bike, and you can enjoy a tubeless ride.
HOW OFTEN SHOULD SEALANT BE REFILLED AND HOW TO DO IT?
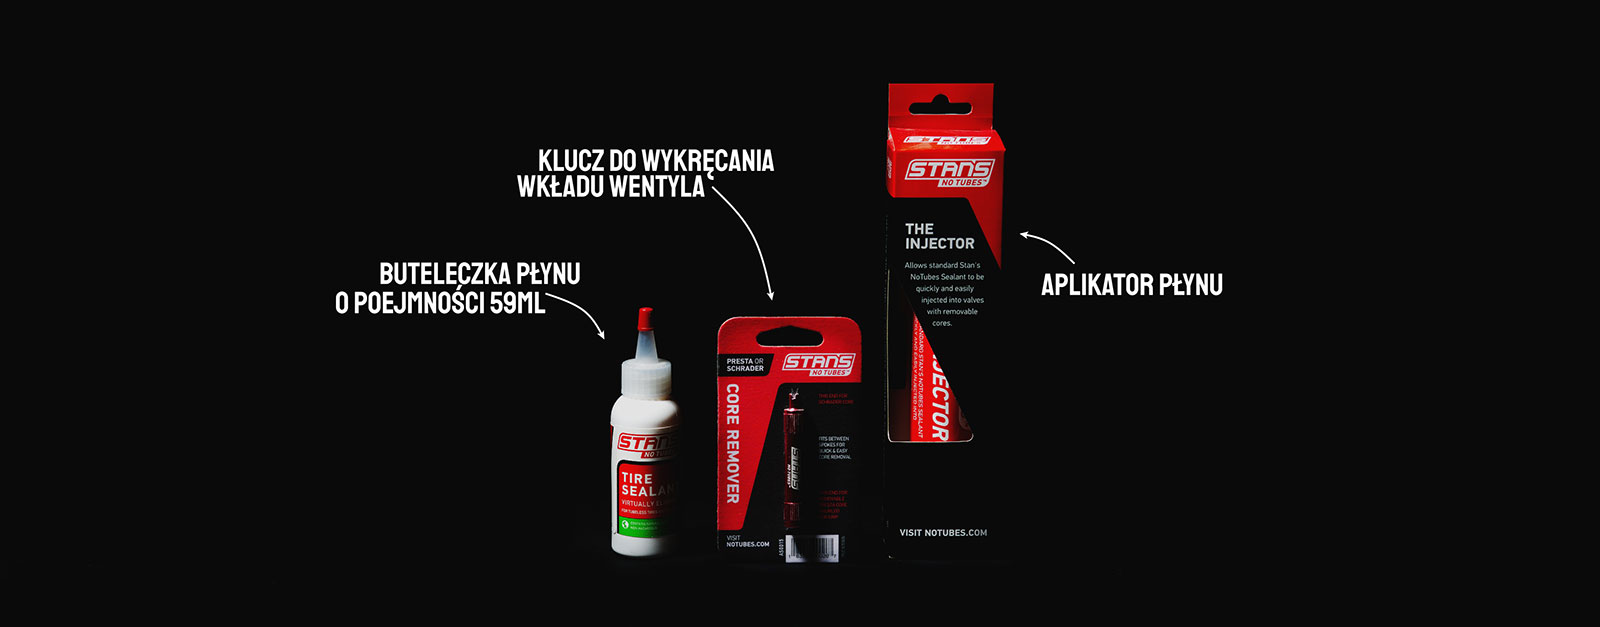
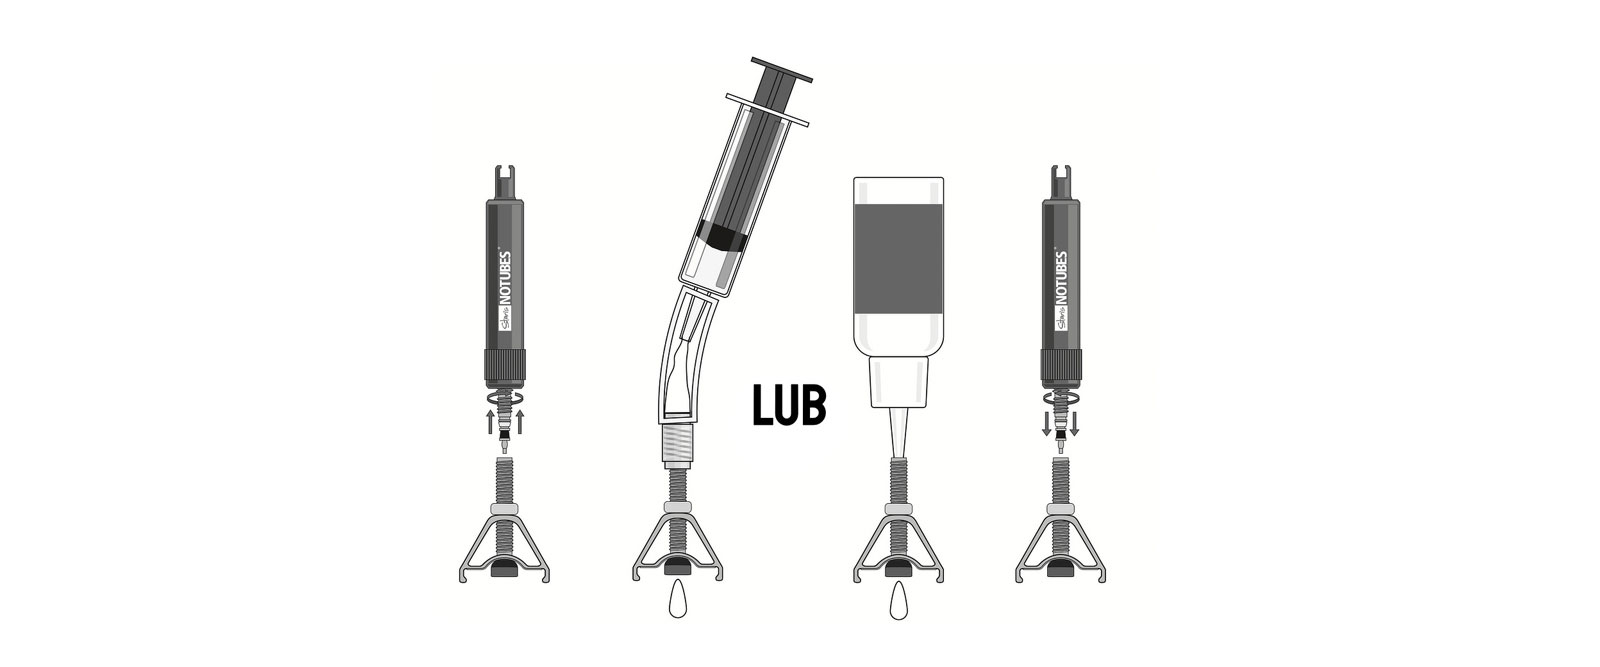
As previously mentioned, sealant can also be poured through the valve. To do this, use a dedicated valve core tool to remove the valve core, then use an applicator syringe or pour the sealant directly from the spout of the smallest Stan's NoTubes sealant bottle. It is recommended to check the sealant level every 4 months.
The diagram below graphically illustrates how to top up the sealant without removing the tire.
I HAVE STANDARD RIMS, CAN I USE A TUBELESS SYSTEM?
It is possible to adapt regular rims for a tubeless system. Stan's NoTubes offers special rim tapes, which can also be purchased in kits containing the necessary accessories for sealing.
Such a kit includes:
– two rim tapes with integrated valves
– a 473ml bottle of sealant
– a roll of universal 12mm wide sealing tape
WHAT IF THE SEALANT DOES NOT SEAL THE PUNCTURE?
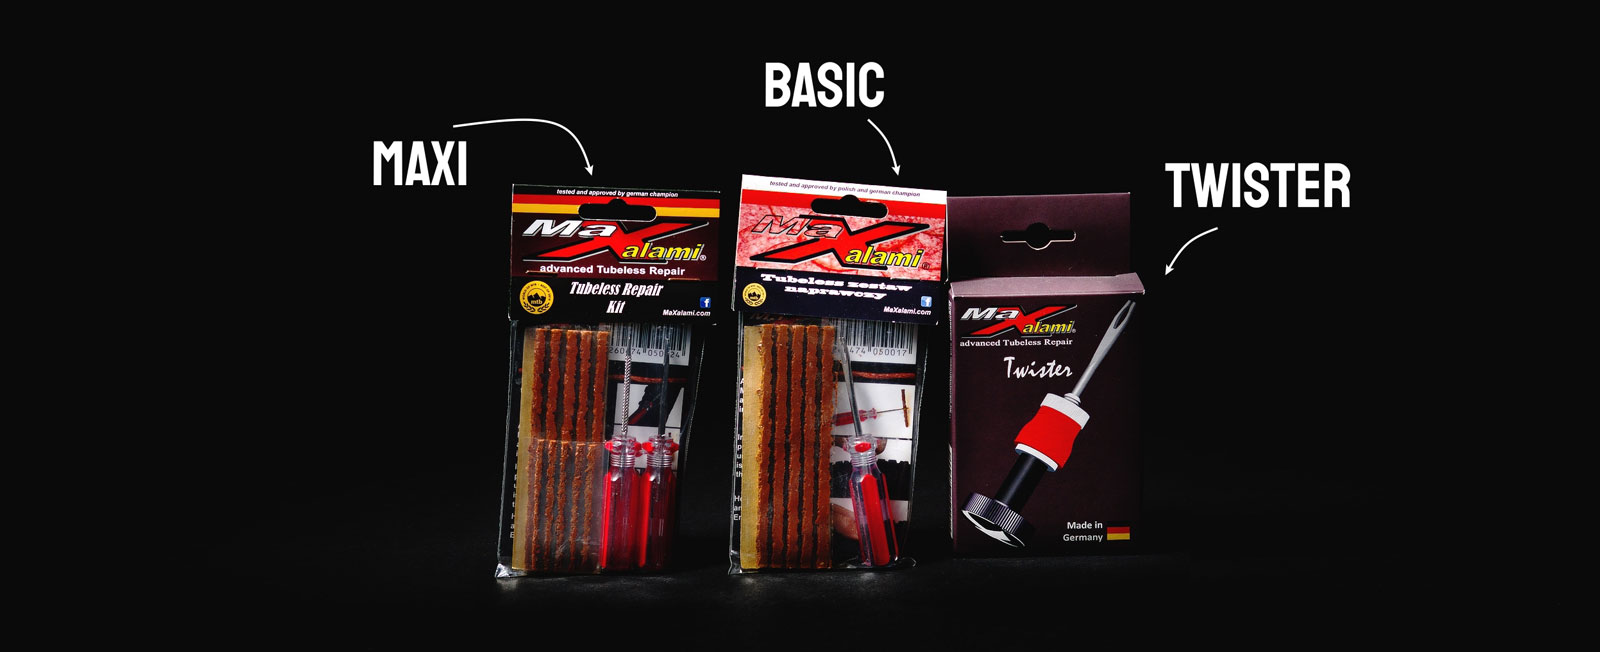
In such cases, Maxalami products come to the rescue. These are special, innovative plugs that seal punctures in the tire. Maxalami products are excellent “emergency” kits. They are lightweight and handy, making them easy to carry in a pocket for every ride.
The basic Maxalami kit is the BASIC set. It contains 5 plugs with a thickness of 3.5mm and an insertion tool, allowing for easy placement of the plug into the tire puncture. A tire repaired in this manner is fully functional and allows for continued riding.
In addition to the insertion tool and 5 plugs with a thickness of 3.5mm, the MAXI kit also includes 5 plugs with a thickness of 1.5mm (Maxanossi), which are designed for repairing smaller punctures. They can also be used in road tires. The kit also includes a special awl used to clean the puncture before applying the plug.
The TWISTER is an option for those who prefer not to carry anything in their pockets. This kit allows the insertion tool to be stored within the handlebar (where the bar end plug is inserted) or in the crank spindle opening.
For safe pocket storage of the insertion tool, the tube version can be considered. Maxalami BASIC TUBE, TUBE PLUS, and ROAD TUBE are kits containing plugs and an insertion tool, conveniently stored in a compact tube, ideal for a pocket.
Basic Tube includes an insertion tool and 5 plugs with a width of 3.5mm; Tube Plus features an insertion tool, 3 plugs with a width of 3.5mm, and 5 plugs with a width of 1.5mm. Road Tube contains an insertion tool and 5 plugs with a width of 1.5mm.
In addition to all the methods mentioned here for preventing or resolving a puncture, there is one more safeguard. If, for any reason, the above solutions cannot be used, an inner tube can simply be installed in the tire. This solution will certainly allow you to reach a point where the issue can be resolved.